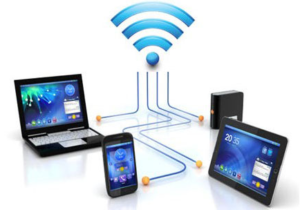
Do you want to use your PC as a wireless hotspot or mobile hotspot? If yes, then you are in the right place. Whether you’re connecting to the internet through a mobile hotspot or a wireless or wired adapter. Windows 10 enables you to share a Wifi connection with other devices using a feature known as “Hosted Network”.
Hosted Network is a feature in Windows 10 that comes with the Netsh (Network Shell) command-line utility. It’s was earlier launched in Windows 7, and it enables you to use the OS to create a virtual wireless adapter. It is just like a thing that Microsoft refers to as “Virtual Wi-Fi” to create a SoftAP. SoftAP is a software-based wireless access point.
With the help of this combination of these two elements, your computer can take its internet connection and share it with other wireless devices.
Windows 10 makes it quite easy and simple to share your internet connection with other devices. Whether they are executing Windows 10 or not. If however, you want to share an internet connection to your computer from your Android device or iOS.
Here’s what you need to do to share your internet connection with Windows 10.
Contents [hide]
- 1 Use Your PC As A Wireless HotSpot – Share Your Internet Via Mobile Hotspot
- 2 Check If Your Wireless Adapter Supports Hosted Networks Or Not?
- 3 Steps To Create Wireless HotSpot In Windows 10 – Use Your PC As A Wireless HotSpot
- 4 Steps To Share Your Internet Via Hosted Network
- 5 How to stop sharing Wifi with other devices
- 6 Use Your PC As A Wireless HotSpot – Modify Hosted Network settings
- 7 How To Check Current Hosted Network Settings
- 8 What’s More?

If you want to get started, you want to find the mobile hotspot settings on your Windows 10 PC. Head over to the “Network & Internet” section under settings, or use the search bar to type the name in Windows 10 to search for “mobile hotspot.”
Once there, you can select to share your internet via Wi-Fi or Bluetooth. Keep in mind that sharing your Wifi connection through Bluetooth probably not be the best choice. Bluetooth is used to connect devices at a short distance or short-range whereas Wi-Fi is good for high-speed internet access. Also, with the help of Wi-Fi, you can share your connection with many devices.
For this example, I will explain to you how to share your PC as a mobile hotspot through your Wi-Fi connection. Simply toggle the “Share my connection with other devices” at the page top. At the bottom of it, select the option that you like to share your connection through Wi-Fi. The most important thing you want to do is to set a network name, password, and band for your mobile hotspot.
After you have successfully configured the network password, name, and band, you want to complete the Wi-Fi connection on the other device. Alternatively, head over to the Wi-Fi settings,. You can then find and choose your network password or network name to connect to the mobile hotspot.
Also, you can use Bluetooth, but Wi-Fi is a good choice if you want to get the instant internet connection speed possible. One benefit of using Bluetooth is that Bluetooth can’t use as much power as Wi-Fi does, so Bluetooth is also the best option if you can’t connect into an outlet.
If you want to check another wireless adapter like Bluetooth, USB, etc then dive down below:
Check If Your Wireless Adapter Supports Hosted Networks Or Not?

Simply head over to the Command Prompt with administrator rights. You can then use the Windows key + X keyboard shortcut, and choose Command Prompt (Admin).
However, some adapters support Hosted Network, you want to check your PC’s physical wireless adapter supports this feature through the following command:
NETSH WLAN show drivers
If the given output display Hosted network supported: Yes, you can then continue with this article. If your wireless adapter can’t be supported, then try to use a USB wireless adapter that supports the feature.
Steps To Create Wireless HotSpot In Windows 10 – Use Your PC As A Wireless HotSpot
Creating a wireless hotspot in Windows 10 is quite simple or easy — don’t allow the command line to scare you. Just follow the instructions to configure a wireless Hosted Network:
Step 1:
Head over to the Command Prompt (Admin) enter the following command:
NETSH WLAN set hostednetwork mode=allow ssid=Your_SSID key=Your_Passphrase
SSID specifies the name you like to check your wireless network when trying to connect a new device. Passphrase specifies the network security key you like users to use to connect to your network.
Step 2:
After you’ve created a Hosted Network, input the following command to enable it:
NETSH WLAN start hostednetwork

Also, you create and begin a Hosted Network on your computer. However, any wireless capable device can’t access the internet just yet. The last thing you want to do is to share a Wifi connection using the “Internet Connection Sharing” feature using a physical network adapter.
Step 1:
Simply use the Windows key + X keyboard shortcut to open the Power User menu, and choose the Network Connections.
Step 2:
Then, right-tap the network adapter with Wifi connection – this could be an older Ethernet or wireless network adapter — choose Properties.
Step 3:
Tap the Sharing tab.
Step 4:
Simply check the Allow other network users to connect through this PC’s Internet connection option.
Step 5:
Then, from the Home networking connection drop-down menu choose the Microsoft Hosted Virtual Adapter.
Step 6:
Tap OK to finish.
How to stop sharing Wifi with other devices
If you want to temporary stop enabling other devices to connect wirelessly using your PC, you can input the following command in the Command Prompt and press Enter:
NETSH WLAN stop hostednetwork
At any time, you can simply use the start variant of the command to enable other devices to connect to the Wifi using your PC as an access point without additional configuration:
NETSH WLAN start hostednetwork
Also, you can use the following command to turn on or off a wireless Hosted Network:
NETSH WLAN set hostednetwork mode=allow
NETSH WLAN set hostednetwork mode= disallow
Use Your PC As A Wireless HotSpot – Modify Hosted Network settings

In the case, if you want to modify some of the current settings, like SSID or network security you can then use the following commands:
NETSH WLAN set hostednetwork ssid=Your_New_SSID
NETSH WLAN set hostednetwork key=Your_New_Passphrase
How To Check Current Hosted Network Settings
There are two commands to view or check the Hosted Network settings on your PC:
The following command displays the mode and SSID name in use, max number of clients that can connect, input authentication, and cipher:
NETSH WLAN show hostednetwork
And the following command will also uncover the current network security key among other settings, just like the earlier command:
NETSH WLAN show hostednetwork setting=security
What’s More?
In Windows 10, the wireless Hosted Network feature enables you to add an access point solution to share a Wifi connection with other devices.
Also, there are a few things you need to know. For instance, wireless speeds will dramatically be limited if we compared to the rates provided from a physical access point. Perhaps it’s not a big deal for Wifi browsing, but installing or moving big files could be a problem for some users.
You also want to consider that your PC needs to be always activated to act as a wireless access point. If the PC enters into hibernate, sleep, or restarts, your wireless hotspot will stop working. Also, you want to initiate manually the feature using the NETSH WLAN start hostednetwork command.
You can’t execute a SorftAP and ad hoc at the same time on Windows. If you want to create a temporary network connection between two PC, setting up ad hoc will disable SoftAP. Also, you can run one or the other, not both at the same time.
Conclusion:
Wireless Hosted Network is an essential feature in Windows. Also, can be a great tool to have for when you want to create a wireless access point on the go. It can’t match the performance of a physical wireless access point, but it can be essential for lots of unexpected cases. For further queries and questions let us know in the comment section below!
Also Read:


