Groove Music is actually the default music player that comes pre-installed in Windows 10. It also offers music streaming via subscription as well as the purchase through the Windows Store. However, Microsoft did an excellent job revamping the old Xbox Music app and also launching it along with a new name “Groove Music”. However, still, most Windows users don’t really find it suitable for their daily use. Most of the Windows users are still comfortable via VLC Media Player as their default music app as well. And that’s why they really want to uninstall Groove Music from Windows 10 completely. In this article, we are going to talk about How to Uninstall Groove Music From Windows. Let’s begin!
The only problem is actually that you can’t uninstall Groove Music from Uninstall a program window or via simply right-tapping and choosing uninstall. However, most of the apps can be removed via this method, unfortunately, Groove Music basically comes bundled with Windows 10, and Microsoft doesn’t really want you to uninstall it. Anyway, without even wasting any time let’s see How you can Completely delete Groove Music From Windows 10 along with the help of the below guide.
Contents
How to Uninstall Groove Music From Windows
Uninstall Groove Music via CCleaner
- First of all, you need to download the latest version of CCleaner from the official website.
- Make sure to install CCleaner from the setup file and then open CCleaner.
- From the left-hand menu, just tap on Tools, and then click on Uninstall.
Note: It may also take time to show all the installed apps, so just have patience now.
- When all the apps are displayed, then right-click on the Groove Music app and choose Uninstall.
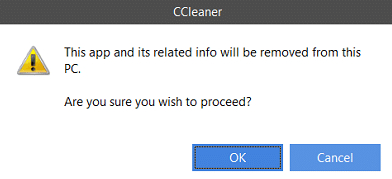
- Tap on OK in order to continue the uninstall.

- You need to reboot your PC in order to save changes actually.
Uninstall Groove Music via PowerShell
Note: Make sure you guys close the Groove Music App, before even continuing.
- Tap on Windows Key + Q in order to bring up Search, just type PowerShell and right-tap on PowerShell from the search result and then choose Run as administrator.
- Then type the following command in the PowerShell window and then click on Enter:
Get-AppxPackage -AllUsers | Select Name, PackageFullName
- Now in the list, just scroll down till you guys find Zune Music. You have to copy the PackageFullName of ZuneMusic.
- Again type the following command and then click on Enter:
remove-AppxPackage PackageFullName
Note: Just replace PackageFullName along with the actual PackageFullName of Zune Music.
- If the above commands don’t really work, then try this one:
remove-AppxPackage (Get-AppxPackage –AllUsers|Where{$_.PackageFullName -match "ZuneMusic"}).PackageFullName
- You guys have to reboot your PC in order to save changes.
Conclusion
Alright, That was all Folks! I hope you guys like this article and also find it helpful to you. Give us your feedback on it. Also if you guys have further queries and issues related to this article. Then let us know in the comments section below. We will get back to you shortly.
Have a Great Day!
Also See: How to React to a Message on Instagram


