On Windows 10, you guys can create a local user account, or also you can create an account that is basically connected to a Microsoft account. In order to take advantage of additional benefits, such as settings syncing across devices and seamless integration to various Microsoft cloud services as well. In this article, we are going to talk about Powershell Create Admin User in Windows 10. Let’s begin!
If you’re running Windows 10, then it’s likely that you are already using an account that is connected to a Microsoft account. But, in the case that you need to set up another account (in addition to using the Settings app and Command Prompt). You can create a new local user account via PowerShell.
Contents [hide]
Further
In modern Windows versions, you mostly have a number of system accounts for many services and internal Windows tasks as well. Additionally a hidden Administrator account and your personal account. If you want to share your PC along with family members or other people, then it is a good idea to create a dedicated user account for each person. This increases the security and privacy of the OS and allows you in order to keep your sensitive data private and your settings personalized to your taste actually.
There are basically two types of user accounts in Windows 10 that you can create
- Local User Account
- Microsoft Account connected User Account
It is actually not possible to create a Microsoft account connected user account along with the help of Windows PowerShell. However, it is very easy to create a local user account using PowerShell.
Before getting started, you guys should know that you guys can create a user account with or without a password as well, and the commands are different because they depend on your choice actually.
What is PowerShell
Powershell Create Admin User in Windows 10
- First, open Start on Windows 10.
- Then search for Windows PowerShell, right-click the top result and choose the Run as administrator option.
- Now type the following command to temporarily save the password in a secure string inside the “$Password” variable and click on Enter:
$Password = Read-Host -AsSecureString
- You have to type the password you want to use for the new account and press Enter.
- Type the following command in order to create the new account and click Enter:
New-LocalUser "NEW_ACCOUNT_NAME" -Password $Password -FullName "USER_FULL_NAME" -Description "Description of this account."

- In the command, you need to make sure to change the account name and user full name with the settings that you want. Also, update the description to anything you guys want.
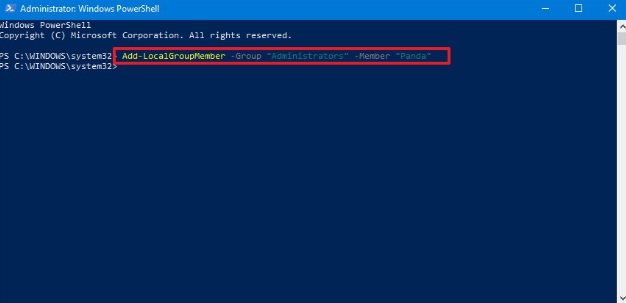
- Then type the following command in order to add the account to the correct user group and click Enter:
Add-LocalGroupMember -Group "Administrators" -Member "NEW_ACCOUNT_NAME"

In the command, you need to make sure to change the account name. In the above command, we are adding the new account to the Administrators group, which gives the user full access to the device as well. But, if you want the user to have limited access, you can also add the account to the Users group, which makes the account a “Standard User.”
When you complete all the steps, a new account will be added to your device along with full access using administrative privileges. Obviously, this is unless you added the account to the Users group, in that case, the account will just be a limited normal account.
Connect your new account to a Microsoft account
Using PowerShell should be also possible in order to create a user account connected to a Microsoft account. However, it appears that there’s a bug with the command that doesn’t allow us to create this type of account.
In order to link a local account along with a Microsoft account, use these simple steps:
- First, sign-in using the newly created Windows 10 account.
- Then open Settings.
- Tap on Accounts.
- Tap on Your Info.
- Press the Sign in with your Microsoft account instead of link.
- Then continue with the on-screen directions in order to connect your account to a Microsoft account.
After you complete all of these steps, then the new account will be connected to the Microsoft account you specified.
Local User Account without password via PowerShell
If you want to create a new local user account without any password using Windows PowerShell. Then open Windows PowerShell with administrator privilege. For that, tap Win+X and select Windows PowerShell (Admin) from the list. After that, you need to execute the following command-
New-LocalUser -Name "user-name" -Description "Small description" -NoPassword
Do not forget to replace the user-name along with an actual username that you want. Also, replace Small description text with the matter that you want to show as a description as well.
After executing the command, you guys will be able to set up your account and use it accordingly as well.
Delete a new local user account via PowerShell | powershell create admin user
If you guys no longer need the account, then you can also remove it using these steps on PowerShell:
- First, open Start.
- Search for Windows PowerShell, right-click at the top result, and then choose the Run as administrator option.
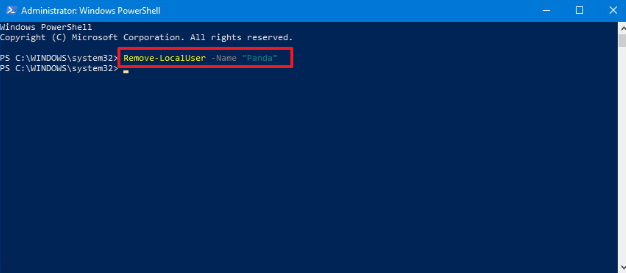
- Then type the following command in order to delete the user account and tap Enter:
Remove-LocalUser -Name "USER_ACCOUNT_NAME"

In the command, make sure to change the account name in order to remove the correct account. If you use the wrong name, it can end up deleting the incorrect account.
After you complete all of these steps, the account will be deleted from your device. But, the user account data will remain on the hard drive. If you guys want to remove both, accounts and data, the easiest way is to delete the account using the “Accounts” page from the Settings app as well.


