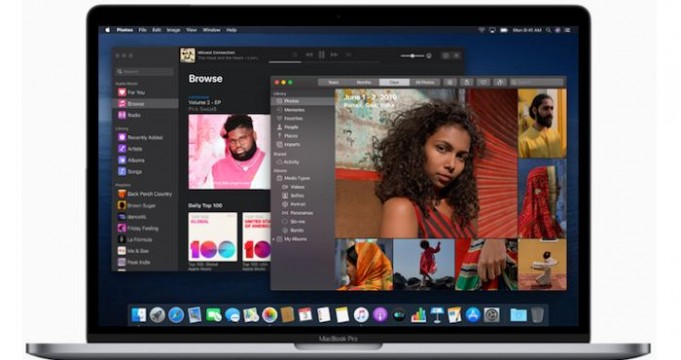
Days have elapsed since Apple released the beta of its new operating systems. After the release of the public betas of iOS and iPadOS 13 , those of Cupertino released the public beta of macOS Catalina. In this post, we will show you step by step how to install the public beta on your Mac in a simple way.
Contents [hide]
Aspects to be taken into account for the installation of macOS Catalina
Being macOS, a larger and more complex operating system than iOS and iPad OS 13, you must take into account that different apps are used on the Mac besides that it can be your main work team. If you have only one Mac and you risk testing this beta, from personal experience I recommend that you do it in a long period of time. That is to say, that you have several days to try it without hurry and above all that you can discover the new functions. A weekend would be the most appropriate.
Another important point as I mentioned earlier, the apps. If you use an app (old specifically) you will not have the optimal functioning or it will stop working when you install the beta. In this article, we cite several apps that will no longer be compatible with macOS Catalina.
And finally, the manual backup or backup. Apple offers you the option of Time Machine if you have an external disk or storage unit with enough space you can do this back up in a few clicks. Otherwise, if you want to do a clean installation of the beta and in case of returning to macOS Mojave, you will need a manual backup of documents, images, music, videos, etc.
How to install the public beta
First of all, you should check if your Mac is in the list of compatible devices.
- MacBook Pro (Mid 2012 and later)
- MacBook Air (Mid 2012 and later)
- MacBook (Early 2015 and later)
- iMac (Late 2012 onwards)
- iMac Pro (2017 onwards)
- Mac Pro (Late 2013 onwards)
- Mac Mini (Late 2012 onwards)
If your Mac is compatible and if you have already backed up via Time Machine or manual, follow the steps below to download the public beta profile and perform the installation
- From Safari, access the public betas page of Apple.
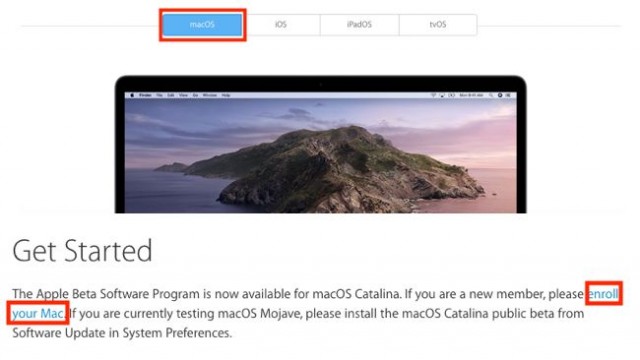
- If you have never tried a public beta, click on the “Sign up” button. If you are already a registered member, login with the “Sign in” button. In both cases, you will be asked for your Apple ID.
- Select “macOS” and then swipe down to click on “Enroll your Mac”.
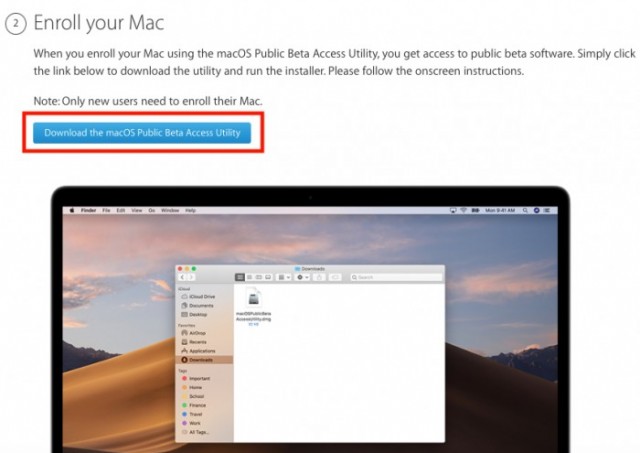
- On the next page, scroll to step 2. Click on “Download the macOS Public Beta Access Utility”.
- You will download a disk image (file) that you must open later. Choose to install the public beta profile and follow the installation steps.
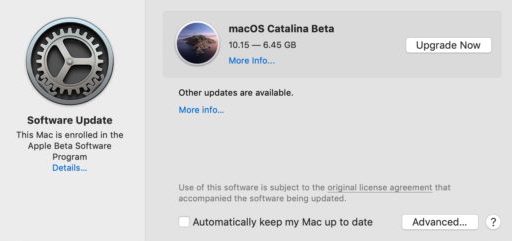
- Finally, go to “System Preferences” -> “Software Updates”. You will have ready Catalina macOS to download and update. Keep in mind that you have to refresh this page to see the progress of the installation.
- At the end of this download, all you have to do is follow the steps of installing the beta, select the target disk and wait for it to complete.
Final recommendations
Remember that if you want to remove this beta, we leave the following link where you can see how to return to an earlier version of macOS. If you stay in the beta, do not forget that every time a new beta is announced you can update. This in order that you can notice the changes between betas, if errors have been corrected or if the system is improving. Being a beta is not free of serious errors.
If you want to report a bug to Apple, in the Feedback app you can do so to be taken into account. If they are general errors that most of the users notice, surely those of Cupertino will make the arrangement.
Also See:iOS 13 will revitalize the forgotten Voice Control on the iPhone


