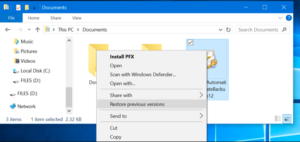
What do you know about Windows 10 Previous Versions? Do you want to turn on Previous Versions to recover files on Windows 10? On Windows 10, “Previous Versions” is an amazing feature that enables you to backup lost or removed files using File Explorer.
Previous Versions actually copy of folder or files that the PC automatically saves as part of a shadow copy. However, it means that for the feature to work, you need to configure a backup point or File History or use a combination of commands or Task Scheduler to create shadow copies at various intervals automatically.
In this article, you’ll learn different methods to turn on Previous Versions to undelete. As well as backup previous revision of files store on your PC running Windows 10.
Contents
How To Turn On Previous Versions Via File History

If you want to configure File History to turn on Previous Versions, plugged an external drive to your PC, and use these steps:
Step 1:
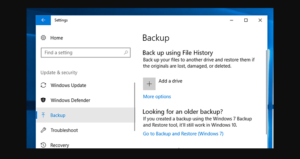
Head over to the Settings.
Step 2:
Then tap on Update & Security.
Step 3:
Also, tap on Backup.
Step 4:
Tap the Add a drive button.
Step 5:
Choose the drive you like to use as the backup drive.
After you complete the steps, every backup of File History revision will become available to backup files using Previous Versions in File Explorer. However, file history has lots of options and settings that you can configure.
How To Turn On Previous Versions Via Restore Point

If you want to turn on restore point to back up lost or removed files with previous versions, use these steps:
Step 1:
Head over to the Start.
Step 2:
Look for Create a restore point and tap the top result to open “System Properties.”
Step 3:
Choose the drive using files that you like to use to back up previous versions.
Step 4:
Tap the Configure button.
Step 5:
Choose the Turn on system protection option.
Step 6:
Tap the Apply button.
Step 7:
Tap the OK button.
Step 8:
Tap the Create button.
Step 9:
You can then add a description for the restore point — for instance, Restore Point “date” and “time.”
Step 10:
Then tap the Create button.
Step 11:
Tap the Close button.
Step 12:
Tap the OK button.
Once you finish the steps, every time a new restore point is created. You can then use the snapshot to back up previous versions of files on your device.
However, besides you create new restore points manually, lots of snapshots to use for recovery will be restricted.
How To Turn On Previous Versions Via Shadow Copies

On the other hand, you can also use Volume Shadow Copy with Task Scheduler to make snapshots of data on the drive to backup files via Previous Versions.
If you want to configure Volume Shadow Copy to turn on Previous Versions on Windows 10, use these instructions:
Step 1:
Head over to the Start.
Step 2:
Right-tap the Task Scheduler Library folder.
Step 3:
Also, tap the New Folder option.
Step 4:
Input any name for the folder and tap the OK button.
Step 5:
Right-tap the currently created folder, and choose the Create Task option.
Step 6:
In the “Name” box, input a name for the task.
Step 7:
In the “General” tab, at the bottom of the “Security options” section, choose the Run whether the user is logged on or not an option. (after selecting the option it makes the command window invisible when the task runs automatically.)
Step 8:
Wipe the Do not store password option.
Step 9:
Tap the “Triggers” tab and tap the New button.
Step 10:
You can also use the “Begin the task” drop-down menu, choose the On a schedule option.
Step 11:
At the bottom of “Settings,” add when you want the task to run (for instance, Daily). Whatever the choice you choose, remember to specify the Start settings on the right side.
Step 12:
Tap the OK button.
Step 13:
Then tap the “Actions” tab and tap the New Button.
Step 14:
After using the “Actions” drop-down menu, choose the Start a program option.
Step 15:
From the “Program/script” box, input the following command:
wmic
Step 16:
In the “Add arguments” box, input the following command and tap the OK button.
shadowcopy call create Volume=C:\
The command mentioned-above will make a shadow copy of the stuff available in the C drive. If you save files in another location, make sure to update command with the exact driver letter.
Step 17:
Then tap the OK button.
Step 18:
Tap the “Settings” tab, and make sure to check the following options:
- Allow tasks to be executed on demand.
- Then run tasks immediately after a scheduled start missed.
- When the task fails, restart every.
Step 19:
When the prompt appears, input your administrative username and password.
Step 20:
Tap the OK button.
After you complete the steps, the command will execute on the schedule to create volume shadow copies. However, you can use backup files using Previous Versions.
How To Backup Previous Versions Of Files On Windows 10

If you want to back up previous versions of files, use these instructions below:
Step 1:
Head over to File Explorer.
Step 2:
Right-click the parent folder with the file you want to restore and select the Properties option.
Step 3:
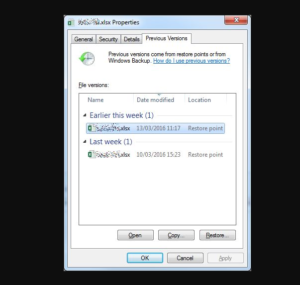
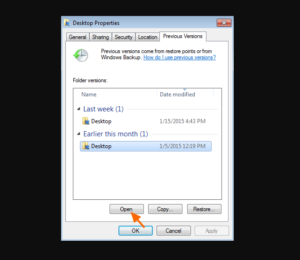
Tap the Previous Versions tab.
Step 4:
At the bottom of the “File versions” section, you’ll then find a list of different times where a shadow copy was created that enables you to backup a file (or folder).
Step 5:
Choose the content.
Step 6:
Tap the arrow button located next to the Restore button.
Step 7:
Choose the Restore To option.
Step 8:
Choose the location to back up the file (or folder).
Step 9:
Also, tap the Select folder button to backup the files.
Once you complete the steps, you’ll have to recover a lost or remove file or folder.
Conclusion:
To sum up, this article has introduced different methods to turn on Previous Versions to recover files on Windows 10. If you are facing the problems, try these methods to help out. If you know any other method or trick to fix the issue then let us know below!
Also Read:


