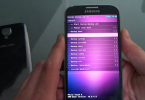
Download and install a Custom ROM with TWRP Recovery. Guide on how to use custom TWRP recovery to (flash) a Custom Rom (custom ROM), on any Android Device. As the Android system is open source, developers can add modifications to a STOCK ROM. Thus the Stock ROM is transformed into a customized ROM (cooked) that is a customized operating system.
TWRP recovery lets you do a number of cool stuff but the whole point of having a custom recovery is to be able to flash unsigned .zip files. These .zip files could be anything from a custom kernel, boot, recovery, MODs or full custom ROMs.
Also Read: Install TWRP on Galaxy S10, Galaxy S10+ and Galaxy S10e
Flash a Custom ROM on Android device using TWRP Recovery
Let’s see how to flash a custom ROM on any Android device using TWRP recovery.
- Download and transfer the custom ROM you wish to flash to your device’s storage.
- Boot your device into TWRP recovery.
- Select “Wipe” from TWRP main menu and do a “Swipe to Factory Reset” on the bottom of the screen.
└ Note: This will factory reset your device. If your custom ROM doesn’t require a factory reset, then simply skip this step. - Go back to TWRP main menu, tap on “Install” and select the custom ROMs .zip file that you transferred to your device in Step 1.
- After selecting the .zip file, do “Swipe to Confirm Flash” on the bottom of the screen to begin the custom ROM installation process. This may take some time.
- Once your ROM is successfully flashed, you’ll see “Wipe cache/dalvik” option, select it and then do “Swipe to wipe” on bottom of the screen.
- Once cache & dalvik wipe completes, hit the “Back” button on-screen and then select “Reboot System” button.
That’s all. Your device will now reboot with the custom ROM you just flashed. Since this will be the first reboot after flashing a new ROM, it might take some time to rebuild cache and finish boot, have patience.


