Are you wondering to fix Windows 10 Lock Screen Timeout? By default, Windows 10 lock screen automatically disable when you can’t touch it for over a minute. This is known as a timeout. However, it’s implemented to save battery or power life.
When inactive, the Windows 10 Lock Screen times out and goes off your screen after a few minutes. Whether you need to look at your lock screen longer, or simply keep Cortana readily available on the lock screen. There are different ways to modify the timeout settings for your Lock Screen.
This is something that can be modified very easily and quickly. Just read this guide and follow the steps mentioned below. You can change or turn off the lock screen timeout within minutes!
Contents [hide]
- 1 What do you know about lock screen timeout?
- 2 Guide To Modify Or Turn Off Lock Screen Timeout
- 3 Different Ways To Adjust The Windows 10 Lock Screen Timeout:
What do you know about lock screen timeout?

In Windows 10, the feature has become quite advanced and very essential as well. It shows the current time and date, all available local users, and also provides you the choices to use Cortana and other Windows utilities (as we discussed earlier). You might also select to restart or turn off your device from the lock screen itself.
With more functionality, lots of people are looking to extend the total amount of time the lock screen remains visible even when the PC is inactive. You can then access to Cortana, shows the time and date with the stunning background images, or just liven up the atmosphere rather than displaying a black screen.
The reason is that by design, the OS has a function that checks when the device is locked and waits for a few seconds. When the time expires, the PC screen goes black. This is a function for a mysterious reason, users can’t customize in the Settings app or Control Panel. However, you can also change the Registry to turn on a new option in the power settings to modify the time to anything you want.
Guide To Modify Or Turn Off Lock Screen Timeout
There are different methods to go about modifying or turning off the lock screen timeout in Windows 10. All of these steps are quite simple or easy to follow. But some of them need a bit more time than others.
Tip: All of these tricks can be performed by anybody, as our articles are simple to follow and don’t need any Windows 10 expert. If you know anyone who’s facing these issues with their system, don’t forget to recommend us!
Different Ways To Adjust The Windows 10 Lock Screen Timeout:

The Windows 10 Registry referred to as “Registry,” is a collection of databases of all Windows configuration settings. The Registry is used to save information for hardware devices, software programs, user preferences, OS configurations, and other essential Windows PC systems and processes.
For different purposes, the Registry is what makes your PC mark and if you wrongly alter a component of the Registry. But you don’t know how to undo it, you might effectively render your PC unusable with no recovery option.
Initially, you want to access your Registry to add the timeout setting to your Windows power options. You can also do this simply by editing the Registry manually, or by installing a one-tap hack.
When you add the setting to your Registry, you can adjust the timeout via the Power Options applet in the Control Panel.
How To Edit Windows Registry Manually

If you want to add the timeout setting to your power options in the control panel, you want to adjust one setting in the Windows Registry. Keep in mind that Registry Editor (regedit) is a robust tool that can alter how your Windows device performs and can also make your PC inoperable if you misuse it.
If you don’t know the working of Windows Registry, Microsoft helps you out of it. Microsoft provides an overview that helps you if you’ve never worked with the Registry before. You can also take proper backup of the Registry and your PC before moving further with any Registry modification.
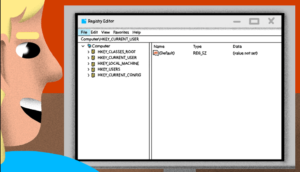
Here are the instructions you want to follow to open the Registry Editor in Windows:
Step 1:
Tap the Windows 10 Start button and input “regedit” Hit Enter to open the Registry Editor and tap OK to provide permission to make modifications to your Windows 10 PC.
Step 2:
When you are in the Registry Editor, you want to use the left sidebar to move to the following Registry key: “HKEYLOCAL_MACHINE\SYSTEM\CurrentControlSet\Control\Power\PowerSettings\7516b95f-f776-4464-8c53-06167f40cc99\8EC4B3A5-6868-48c2-BE75-4F3044BE88A7”
Step 3:
From the right-hand pane, double left-tap the Attributes value to open the windows properties.
Step 4:
Modify the value in the “Value data” box from 1 to 2, then tap OK.
Next, you want to modify the Power Options in Control Panel. If you ever want to erase this setting from Power Options, just move back and modify the Attributes from 2 back to 1.
Modify Windows 10 Lock Screen Timeout in Power Options

Now that you have the timeout setting turned out via Registry, it’s time to move into Power Options in the Control Panel to modify your Windows 10 Lock Screen timeout settings. Here’s a brief article on how to modify your Power Options.
Step 1:
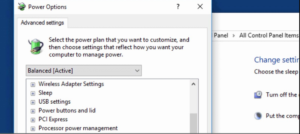
Tap the Start menu and input “Power Options” and press Enter to open Power Options
Step 2:
In the Power Options window, simply tap “Change plan settings”
Step 3:
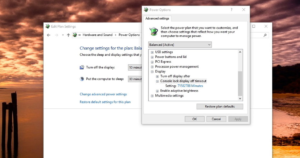
From the Change Plan Settings window, tap the “Change advanced power settings” link
Step 4:
Step 5:
How To Adjust Windows 10 Lock Screen Timeout via Command Prompt

You can also configure the same feature in different methods. On the other hand, you can use the PowerCfg.exe utility to modify your display timeout setting when your PC is locked. When your PC is connected to AC power or when your it is running on battery (DC power).
To modify the Lock screen timeout using Command Prompt, try to do the following:
Step 1:
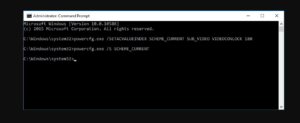
You can simply use the Windows key + X keyboard shortcut to open the Power User menu and choose Command Prompt (admin).
Step 2:
Input the following command and hit Enter:
powercfg.exe /SETACVALUEINDEX SCHEME_CURRENT SUB_VIDEO VIDEOCONLOCK 60
Important: You must modify “60” in the command-line with the timeout time you like to use, in seconds. For instance, if you need the screen to enabled for 5 minutes, then you want to use 300 at the end of the command.
Step 3:
Input the following command and hit Enter:
powercfg.exe /SETACTIVE SCHEME_CURRENT
Step 4:
Use the Windows key + L keyboard shortcut to lock your PC and see if the new settings work.
The command given in step 2 will work when your PC is using AC power. You just replace /SETACVALUEINDEX for /SETDCVALUEINDEX if you want to modify the timeout setting on your PC or tablet running on battery.
Also, remember that while modifying the Registry settings is an advanced task, during my test, I have found that frequently using the command line settings might not work as expected.
Alternatively, modifying the Registry worked well, and whenever you are making tweak, I can just head over to the Power Options settings in Control Panel and adjust the Lock screen timeout without having using any commands.
Conclusion:
To sum up, this article has introduced different methods to fix Windows 10 issue. If you are facing the issue, try these fixes to help out. If you know any other method or trick to fix the issue then let us know below!
Also Read:


