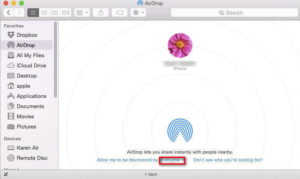
What do you know about AirDrop from iPhone to Mac? AirDrop is the quickest and most essential way to wirelessly share files from an iPad or iPhone to a Mac. While AirDropping from iOS to Mac OS is very simple and easy. How it works might not be specifically obvious to some users, and lots of people don’t know the feature exists at all. If you want to learn this then it is quite easy. Also, it offers an easy and efficient way to move pictures, videos, notes, and other files b/w your devices.
If you want to use AirDrop from iOS to Mac OS. Then you want an advanced version of iOS on the iPhone or iPad. Also, an advanced version of Mac OS on the Mac – generally speaking, the latest software launches the better. So you want to make sure you update your devices if you are having any issue or difficulty. So without your time come let’s take a brief look on this article:
You can double-check AirDrop is turned on your iPhone by moving to Settings → General → AirDrop (you can also lightly hit the WiFi/Bluetooth tile in Control Center). On Mac move to Finder → Go → AirDrop and then adjust settings under it.
Contents [hide]
AirDrop from iPhone to Mac

Step 1:
Search the file, image, video, or other items you want to share
Step 2:
Now locate and click the share button (a square with up arrow)
Step 3:
Click the Mac you want to share the file with
Step 4:
You’ll then view “Sent” when complete
Step 5:
Now look in your Downloads folder on your Mac to find the file
That’s all about it!
Conclusion:
Here’s all about “AirDrop from iPhone to Mac”. If you think that it is helpful then do let us know your suggestions in the comment section below. Have you found any other method that you think we can’t cover in this article? Comment us below!
Till then! Stay Safe ?
Also Read:
Amazon “AirPods” could arrive this month with integrated Alexa


