As a new iPhone or iPad user, you are more concerned about using those exciting applications. That you have been reading about and making the best use of the iPhone and iPad. Photos, videos, instant messaging, email. That is what people mostly do when they get new iPhones and iPads. In this article, we are going to show you how to backup iPhone. Let’s start it!
But as you use your iDevice, you start to store data on it. Right from the time you save contacts to the Phone/Contacts application, your iPhone or iPad starts to store the data that needs a backup. So that you always have a safety net for that data. Thanks to iCloud and the smart integration through iTunes. You can take backups really fast and easy.
Contents [hide]
Backup your iPhone through iTunes
Typically, iTunes on PC or Mac is configured to backup your iPhone or iPad every time you connect it and sync the device. Some of the users change the settings and the default behavior stops. But mostly, if you are a new user, the default settings make sure iTunes takes a backup of your iDevice whenever you connect it.
Backing up on iTunes has its own advantages over backing up on iCloud. You have raw physical data in folders that you can shift or also move around as you want. And you do not have to worry about someone hacking into your iCloud account. The data is almost always safe (the exception being when your Personal Computer runs into some trouble).
To Backup your iPhone Manually in iTunes
- Connect your iPhone or iPad to the PC or Mac
- Then open iTunes on the computer
- Right-click on your device from the sidebar and then click on Back up now...
- Or, click on the device name from the top and then under the Summary tab. Click on Back up Now (found under Backups).

Backup your iPhone through iCloud
Apple and many others recommend this backup more as this is supposed to be a safer and easier method. There is no plugging in and also there is no need to manually backup. iCloud more or less automates the whole process so much. That you do not even have to worry at all.
To set up iCloud Backup
- Open the Settings app from your iPhone/iPad
- Tap on iCloud
- Now, scroll down and tap on Storage & Backup
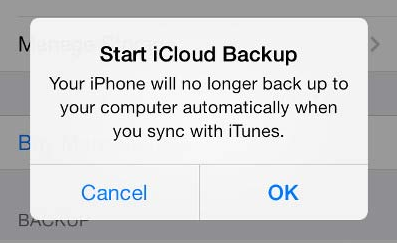
- Switch ON iCloud Backup (You will be warned that the iPhone will not auto-sync when you connect to iTunes. More on this later. For the moment, tap on OK)

- If you are connected to a Wi-fi network. Then tap on Backup Now to initiate the backup.
With iCloud backups, your iPhone or iPad gets back up automatically to your iCloud account. There is 5GB of free storage that comes with your iCloud account (upgradable) and this can be used for the backup. (Photos from the Camera Roll, Safari data, Mail, Calendar and almost everything else is backup already.)
The only huge change is that next time you connect your iPhone to the computer, iTunes will only sync but not backup. You will have to manually backup your iPhone via iTunes to save a copy of the data on your PC.
So that Is how to backup your iDevice and make sure you do not run into any data-related problems. When you reset your iDevice.
Conclusion
Alright, folks, that was all. I hope you like this article and find it helpful to you as well. Also if guys have further issues related to this article. Then let us know in the comments section below. We will get back to you shortly.
Have a Great Day!
Also See: iPad is Disabled Connect to iTunes – How can you Fix


