Are you looking for a way to make photo square via online tools? When you capture a photo with your mobile or a camera, the photo will either be in portrait mode or in landscape mode. However, a time comes when you want to make a photo square without losing any details. The most common method to create a photo square is either to crop or resize the snap. Whenever you resize your image you might distort the image. When you crop, you might lose many details in your picture. If you want to deal with that you can just resize the canvas. Come let’s check how to do it.
Contents [hide]
Different Ways To Make Photo Square Without Cropping
Method 1 – One-Click Web App

If you are wondering for a 1-Click web app to make a rectangle photo into a square without cropping then this is the best choice out there. Recently, Kapwing erased the watermark from its free models. Just drag and drop your picture (or even a video) to this link and wait a while until it process.
The app can automatically apply white padding to your image thus making it the best square. And not just that, you also have the choice to select between other aspect ratios like 4:5, 5:4, 16:9. Also, you make other changes like aligning your picture, left-right, and bottom, etc. And whenever you are satisfied with your modifications just tap on the red Export Image button located on the top right side of the web page.
On the other page, you can just tap on the big download button located on the left side of the image to install the jpeg version of it.
Method 2 – Pixlr
If you want to make a photo square without cropping, then we are going to use a free tool known as Pixlr. Pixler is OS independent and you can then use it right in your web browser.
Step 1:
If you want to start, move to the Pixlr site and then choose the option “Open Image from Computer”.
Step 2:
Then navigate to the folder where your image is saved, choose it, and tap on the button “Open”.
Step 3:
The next thing you can do is open the photo in the Pixlr editor. Now, tap on the option “Canvas Size” from the Image tab.
Step 4:
For a landscape picture, just match height or width and for a portrait picture, just match width with hight. Since my snap is in landscape mode, I’m modifying the photo’s canvas height to match the width. Choose the “Center” tile located next to “Anchor” to the middle of the picture in the canvas. Once done with the modifications, tap on the “Ok” button to apply the changes.
Step 5:
After successfully applying the changes, this is how it seems like in the Pixlr editor. As you can view, we’ve included white space both on the bottom or top of the photo to make it square without losing or distorting details.
Step 6:
If you want to save the image, choose the option “Save” under the File tab.
Step 7:
Now input a new name for the file, choose “JPEG” format, leave the quality setting at default and then tap on the “Ok” button.
Step 8:
In this window, tap on the “Save” button to save the picture.
If you open the picture with the image viewer of your choice you can then view that the photo is squared.
Method 3 – Polarr Photo Editor

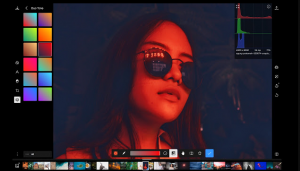
Polarr Photo Editor is also available on the macOS App Store and it can be used as integration to iPhoto editor or another editing tool simultaneously. Although it is not specifically designed for Instagram, the tool also helps you to get photos square by adding padding.
Once you download or install the Polarr Photo Editor:
Step 1:
Head over to the editor app and import the picture.
Step 2:
When the picture successfully loads, tap on the adjustments tab located on the right side of the screen.
Step 3:
Now move down and tap on ‘Border’.
Step 4:
Now choose the aspect ratio and border color from the custom menu available.
Step 5:
Tapping on the save button will save the changes to the image and the Photo Library will be immediately updated. After using an iPhone, it’s probably in your iPhone photo library as well.
Method 4 – Square Size No Crop Photo Maker (Windows)
Square Size No Crop Photo Maker is another app for the Windows app that does what is required from it. However, the app is available on the Windows Store and it can be downloaded for free.
Once successfully downloaded:
Step 1:
Head over to the app and tap on the gallery tab to choose a photo to be imported and edited.
Step 2:
When you successfully import a photo you’ll then view a number of editing options at the bottom.
Step 3:
You can then choose blur or solid backgrounds. Add to that, you can choose from various editing options such as effects, stickers, much more.
Step 4:
After you successfully editing the image, tap on the download icon located on the top right.
Step 5:
If you are unable to view some options or the download button, then navigate to full-screen mode. The app looks to be optimized for full-screen use.
Conclusion:
There were the best methods to photo square the image. If you want to share any other method that we missed then let us know below!
Also Read:


